*Note: Before you start any electrical work on your vehicle before to disconnect the battery
1. REMOVE THE LENSES
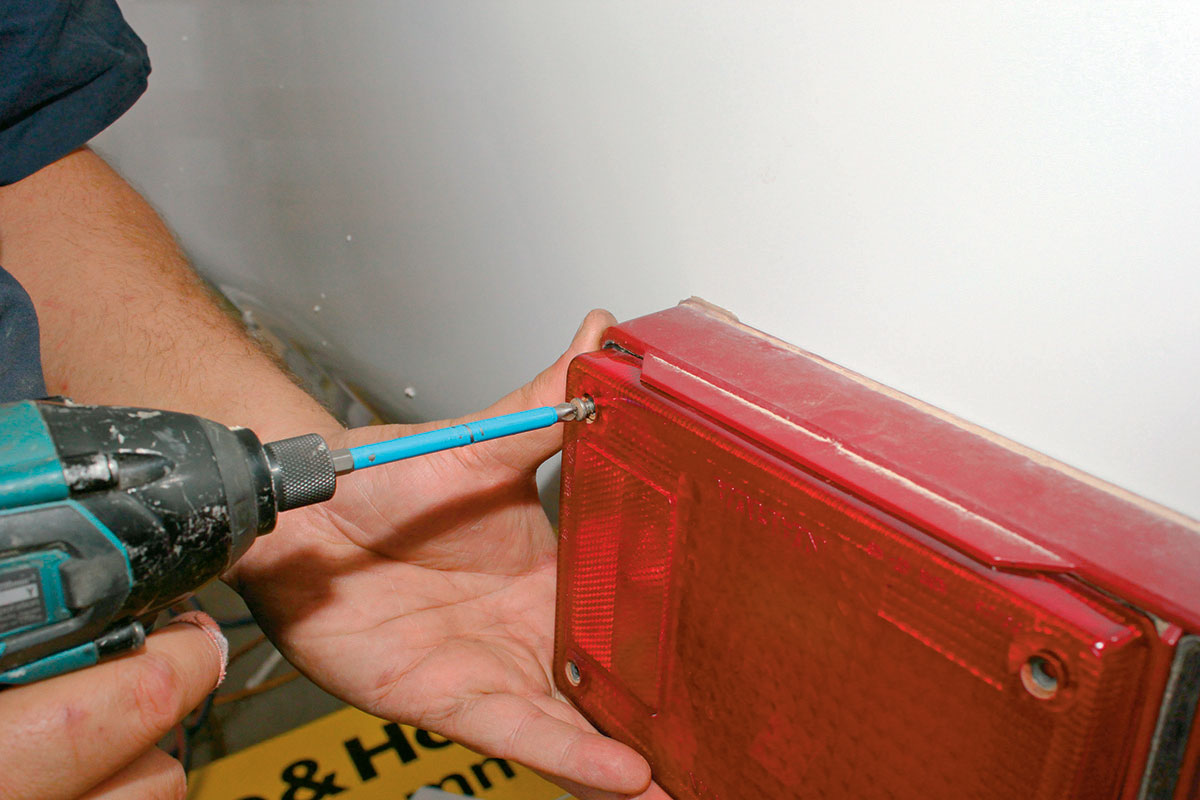
This is the initial step. You will notice that this individual lense is attached by four screws.
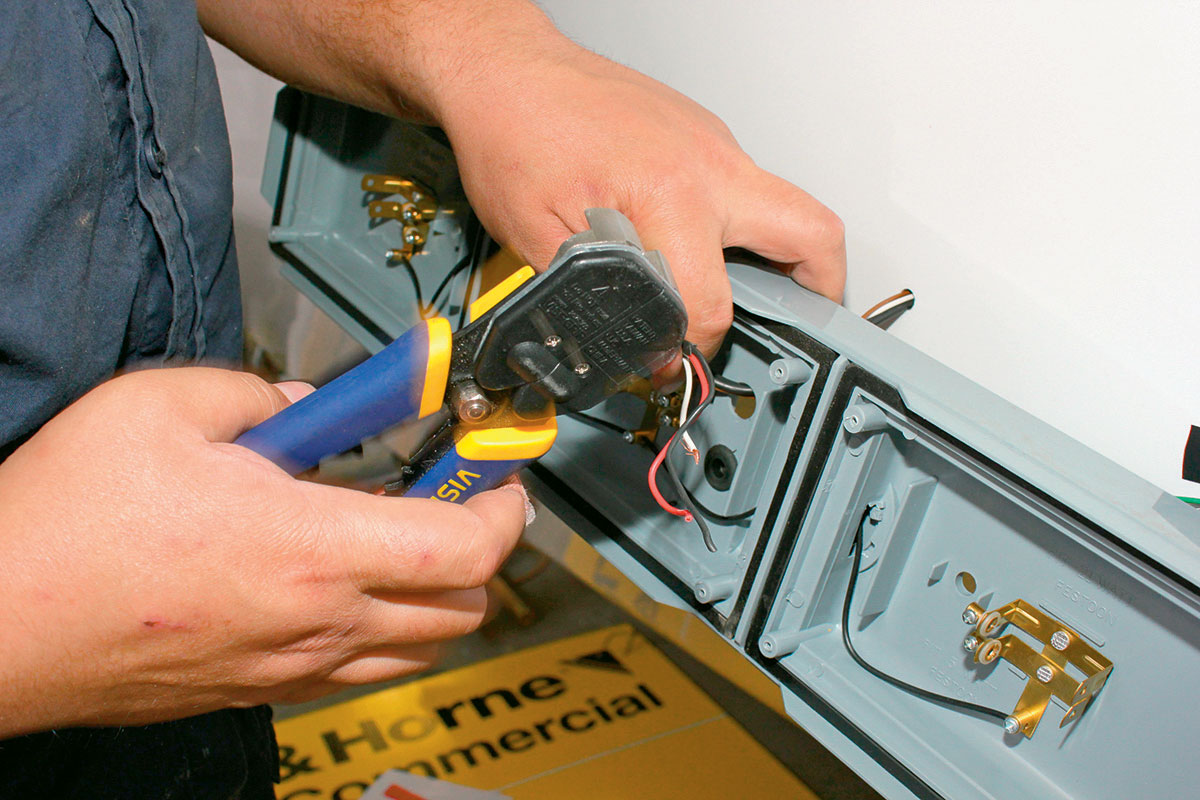
2. CUT THE WIRES
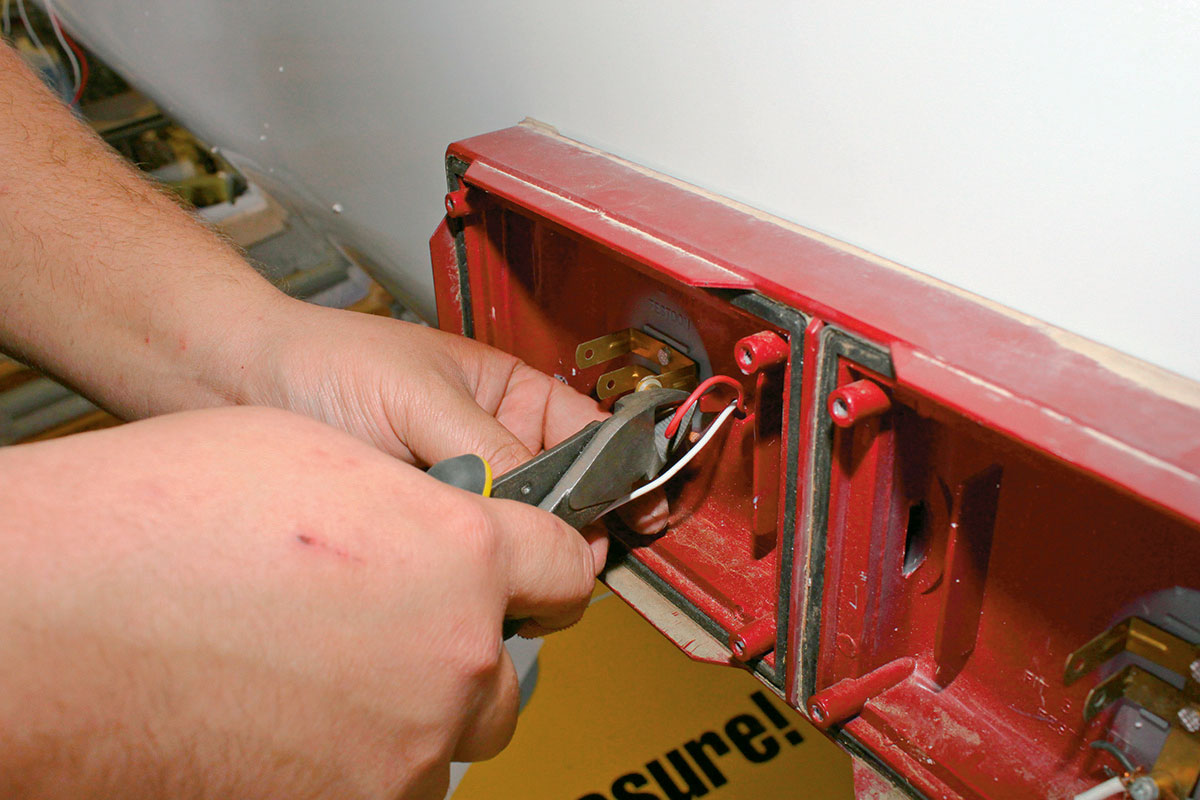
The wires are cut instead of removed from the connection point because of the amount of corrosion on the connections. Get a sharp knife or side-cutters and snip the wire close to the connection point – you’ll see the colour of the wire connections as a reference point for wiring up the new taillights.
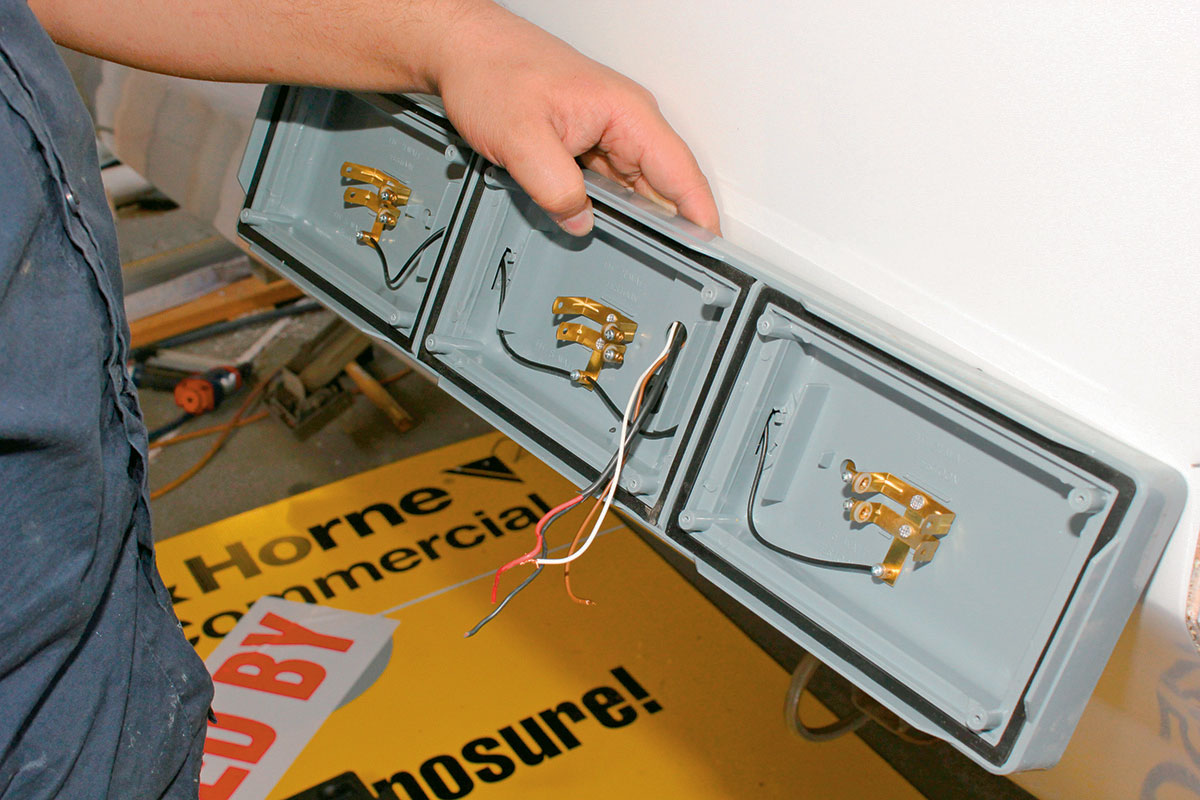
3. REMOVE THE BODY
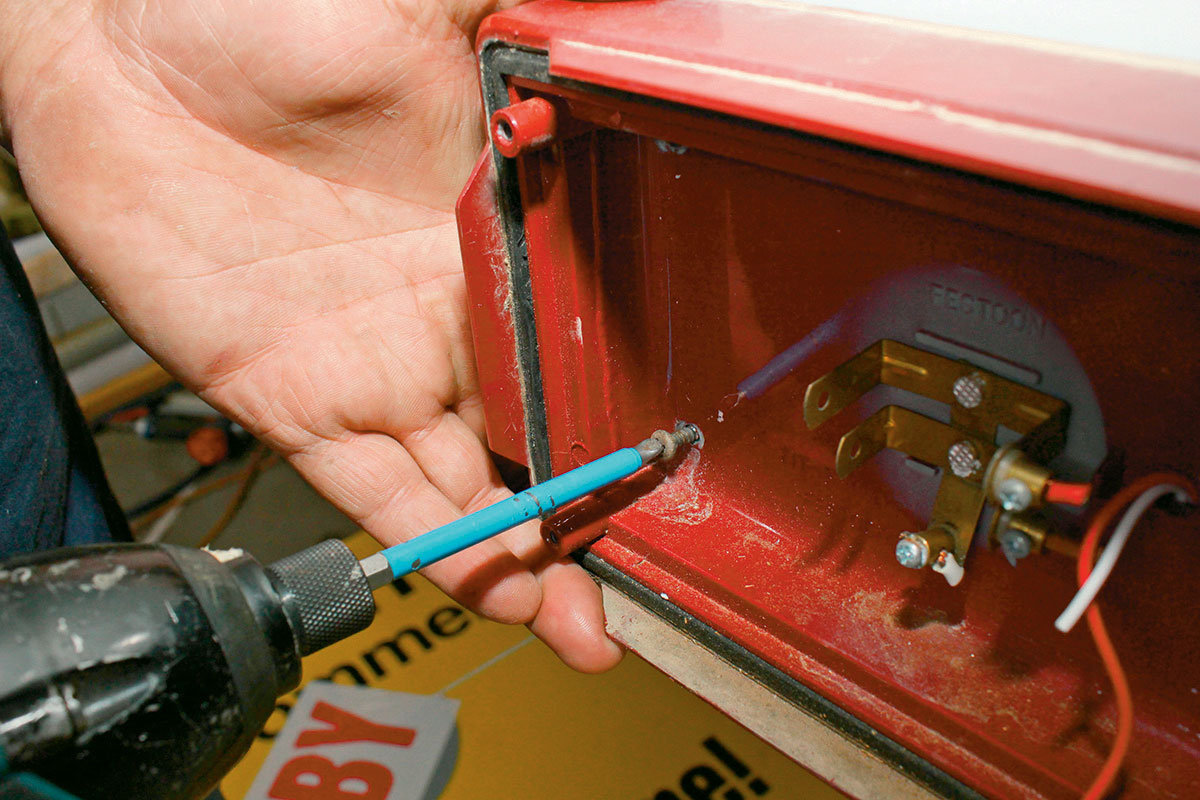
The body of the taillight can be removed from the back of the caravan once the wires are free. Simply unscrew the old taillight backing plate from the caravan.
4. REMOVE THE SCREWS FROM THE NEW TAILLIGHT
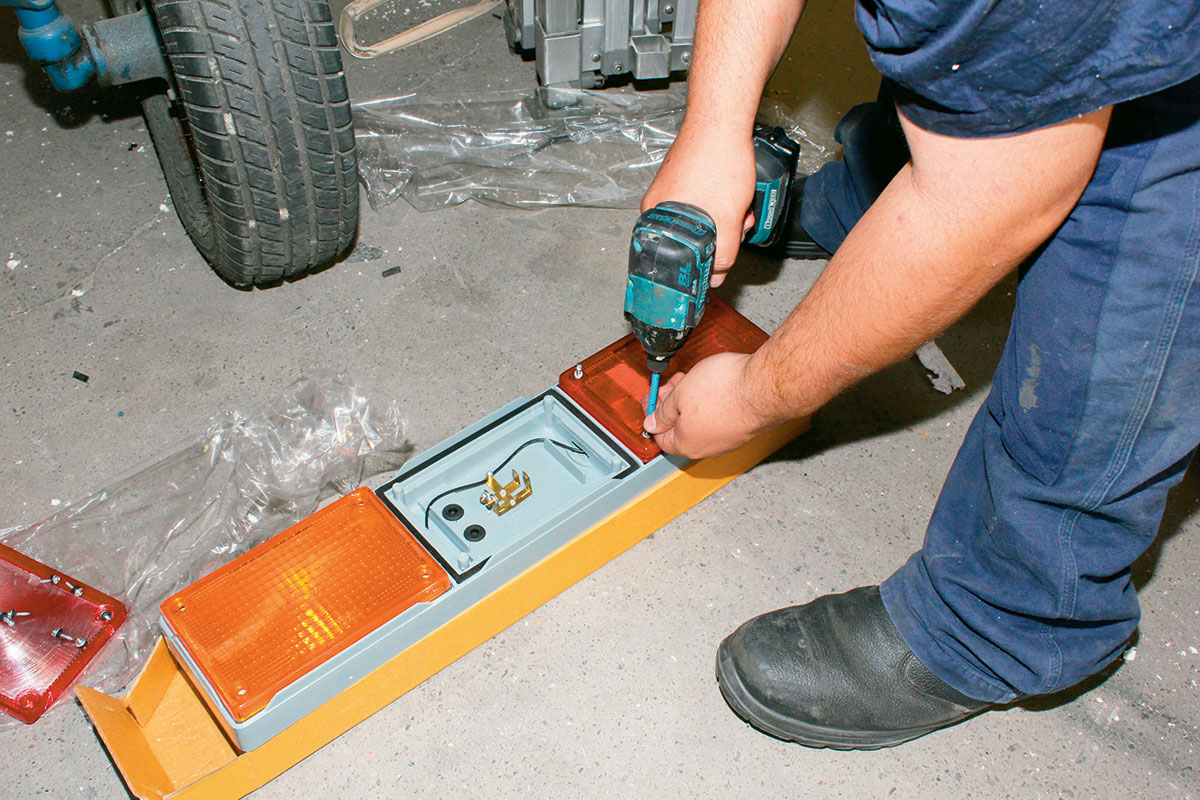
When preparing the new taiillight for fitment, remove the screws holding the new taillight cluster in place. Be careful to store the screws, as they will look better than using old rusty screws if you happen to lose a few of the new ones.
5. FEED THE WIRES
The wires can now be fed through the new backing plate according to the point closest to where they will be connected.
6. CUT BACK THE INSULATION
Check the cut wires on the old taillight as a reference for wiring the new taillight. Remove any corroded or damaged wire ends and cut back the insulation enough to secure the wires.
7. SECURE THE WIRES
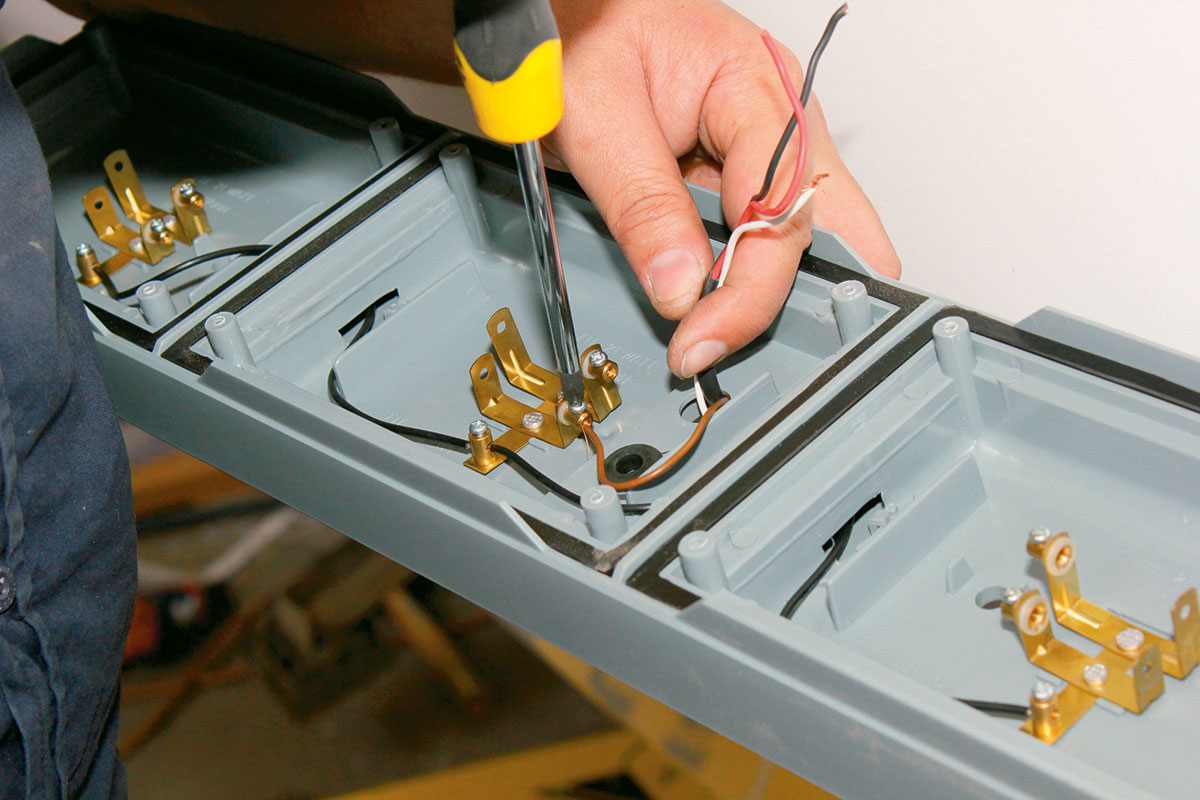
With the insulation stripped back to expose a clean copper core, secure the wires to the screw-down posts. Now you can tuck any excess wire back into the body of the caravan, and seal the holes where the wires have come through with silastic.
8. MARK UP THE PANEL
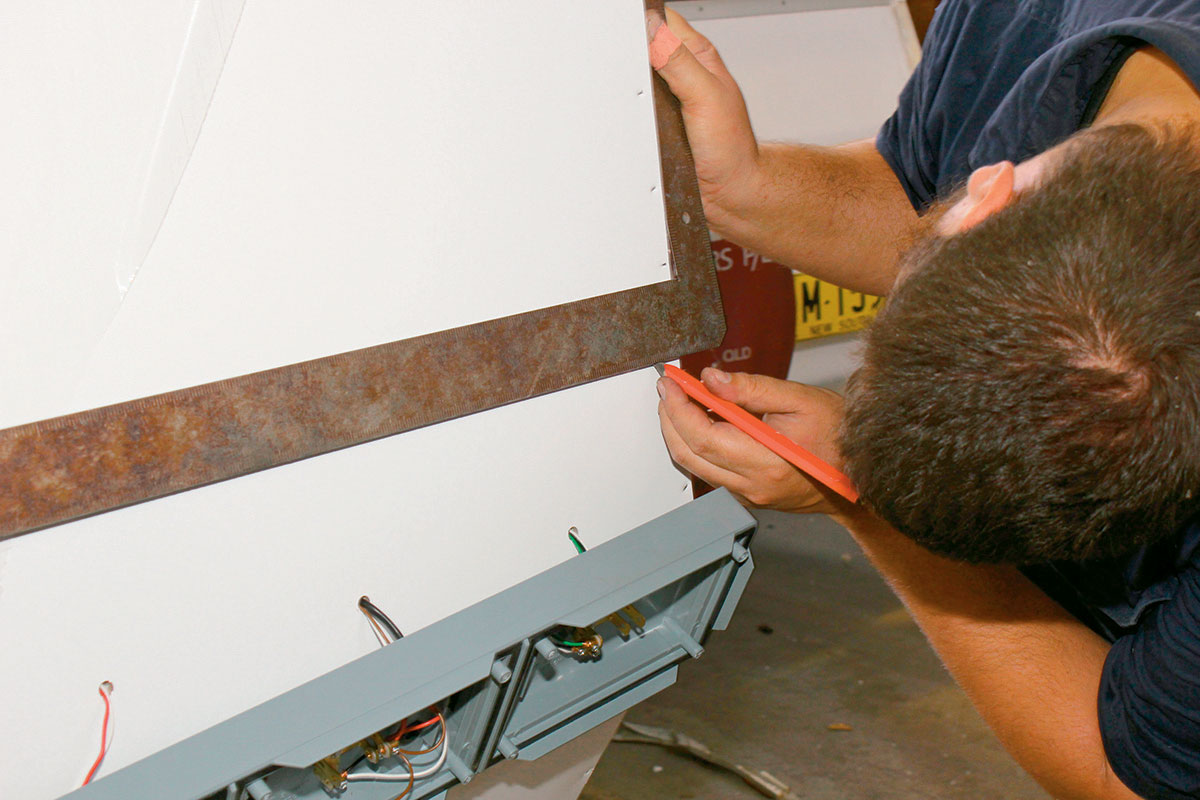
If you’ve replaced the cladding, you’ll have to mark the panel to ensure the new cluster is fitted straight. Get out a steel square and set it up on the side of the van and mark with a pencil or whiteboard marker the horizontal points to guide you in fitting the taillight.
9. SEAL THE WIRES
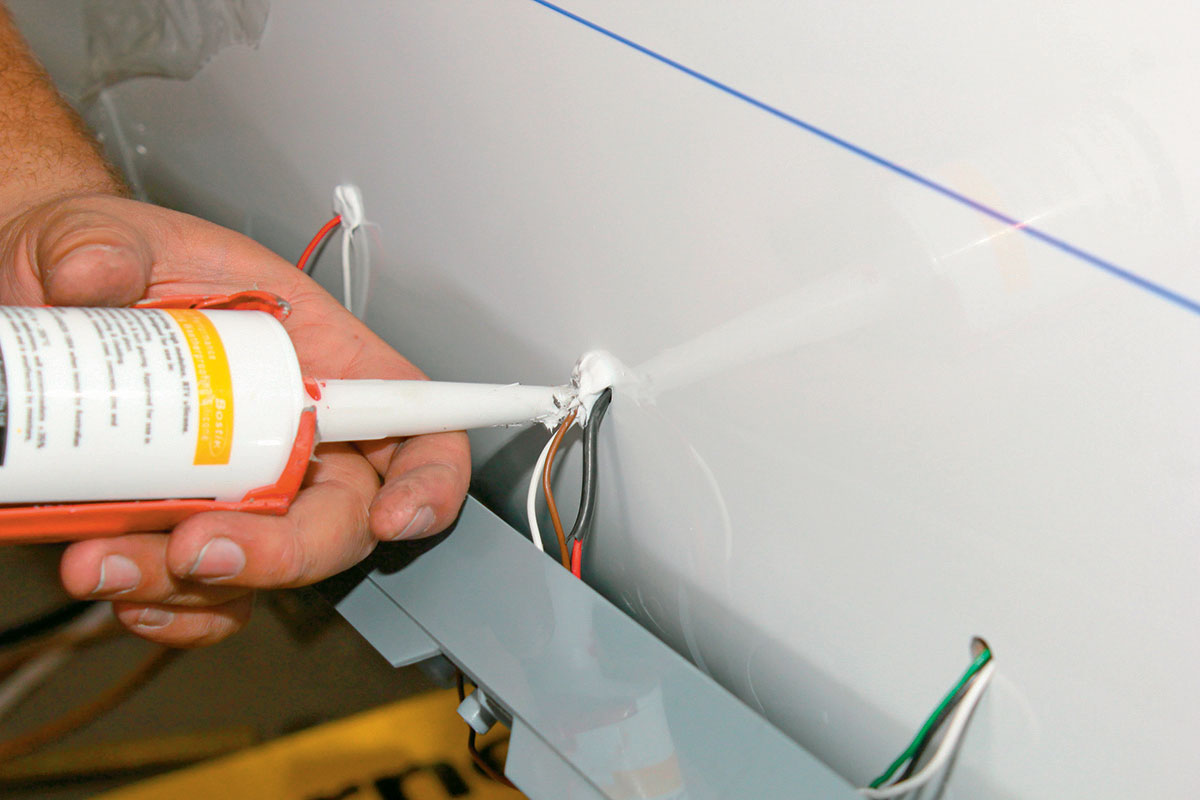
Seal the wires entering the body of the van with silastic to avoid moisture and dirt ingress
10. SCREW THE BODY INTO PLACE
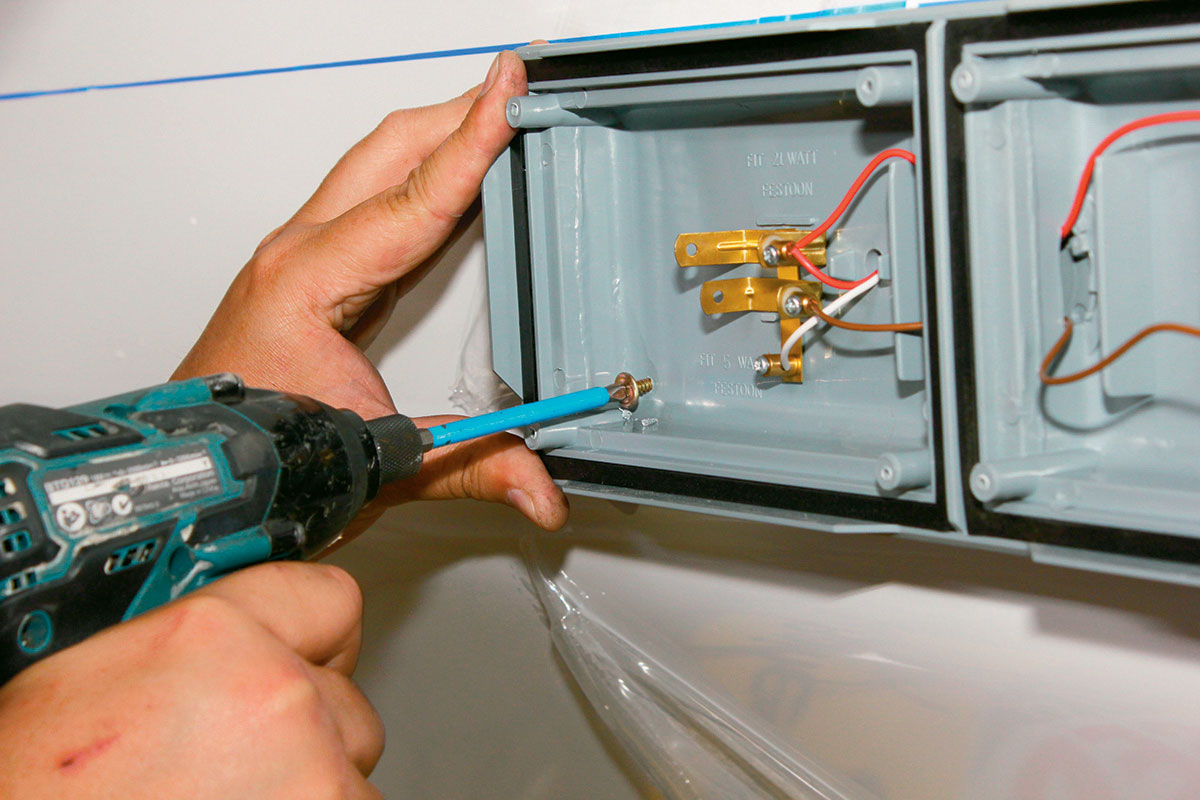
Now the taillight body can be screwed into place with screws.
11. SEAL THE BODY

Then the periphery of the taillight body, including the join between the taillight backing plate to the body, can be sealed with silastic.
12. CLEAN IT UP
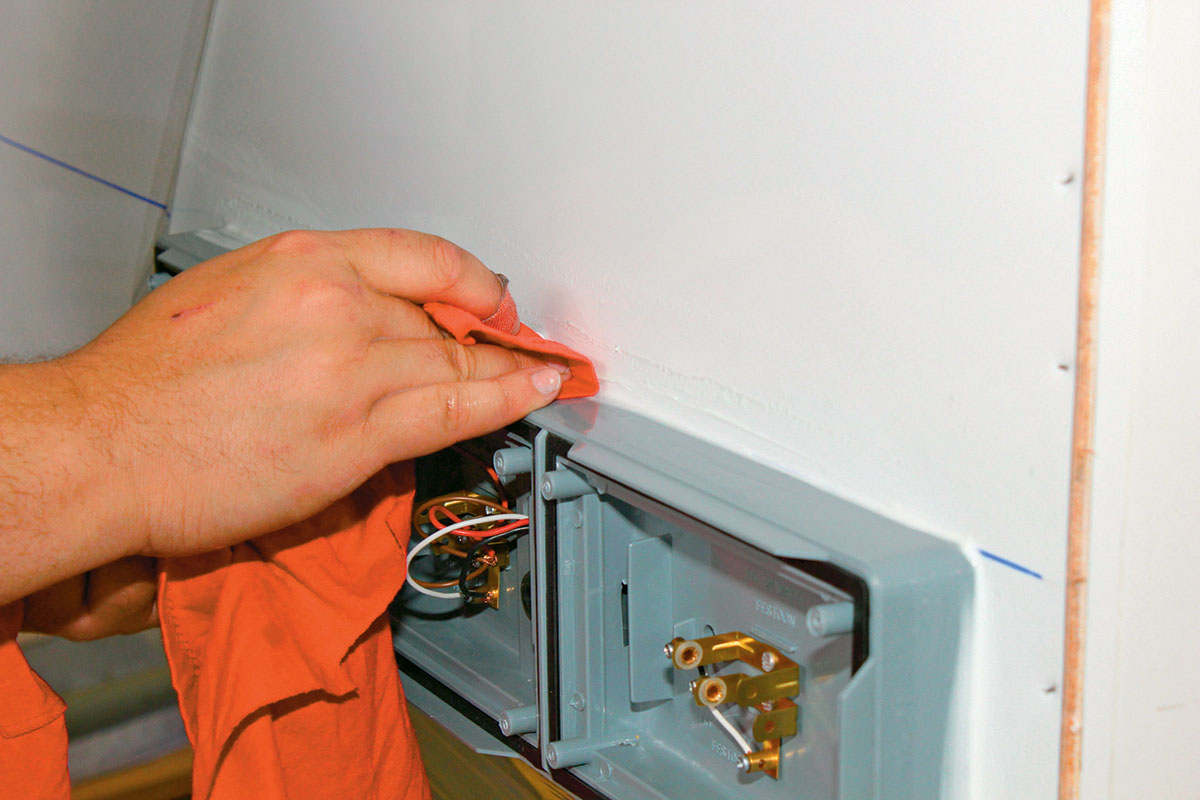
Wipe away the excess silastic using detergent mixed in water sprayed onto the bead then remove the excess with a cloth.
13. CLEAN THE GLOBES
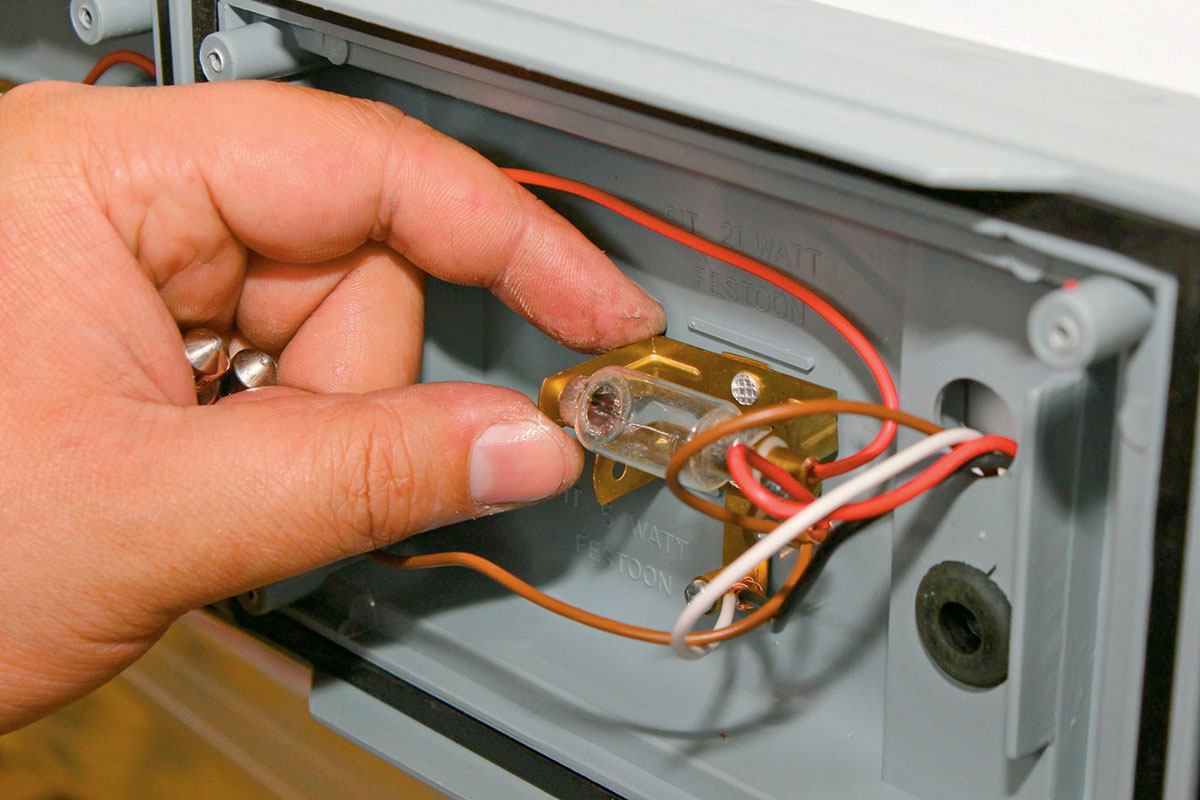
When installing the new incandescent globes, make sure you wipe the glass of the globes with a clean cloth. The oil from your fingers will cause the globes to fail earlier than they otherwise would. Alternatively, you can use gloves to fit them.
14. ATTACH THE LENSES
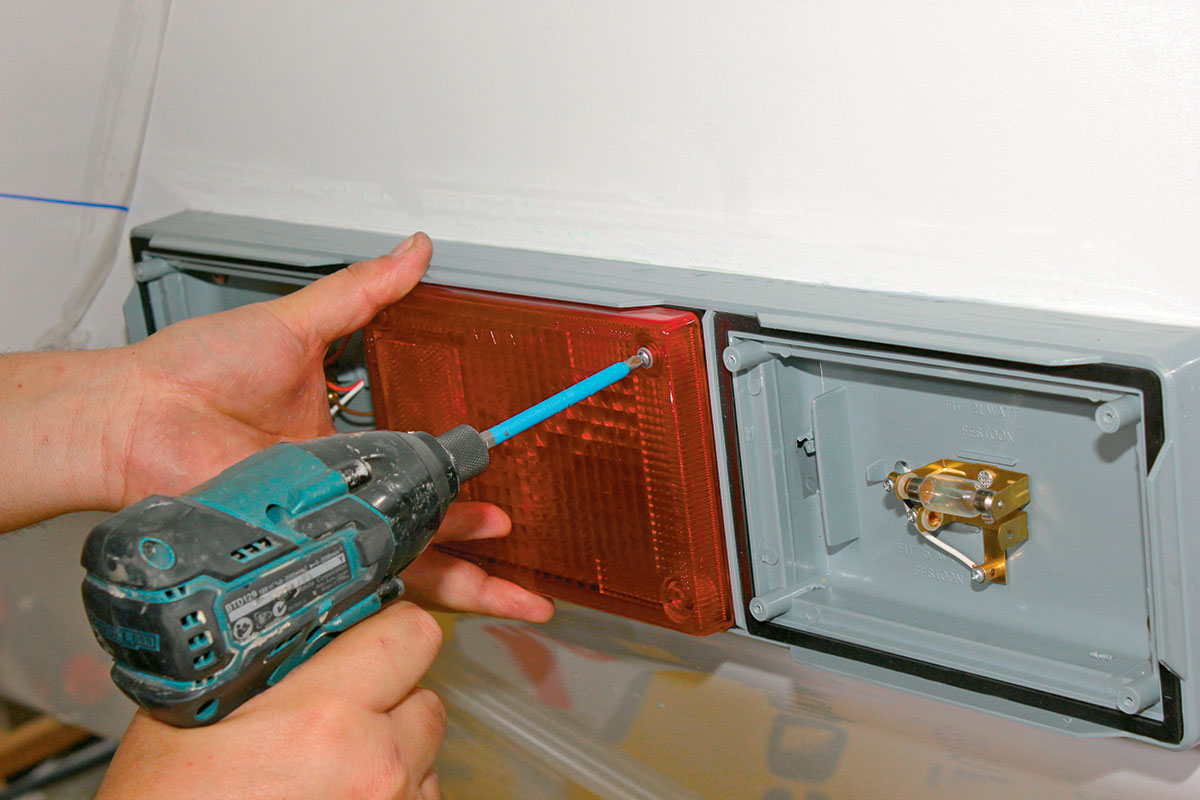
Now the lenses can be attached into place with the screws and the lighted checked.
15. TEST THE TAILLIGHTS
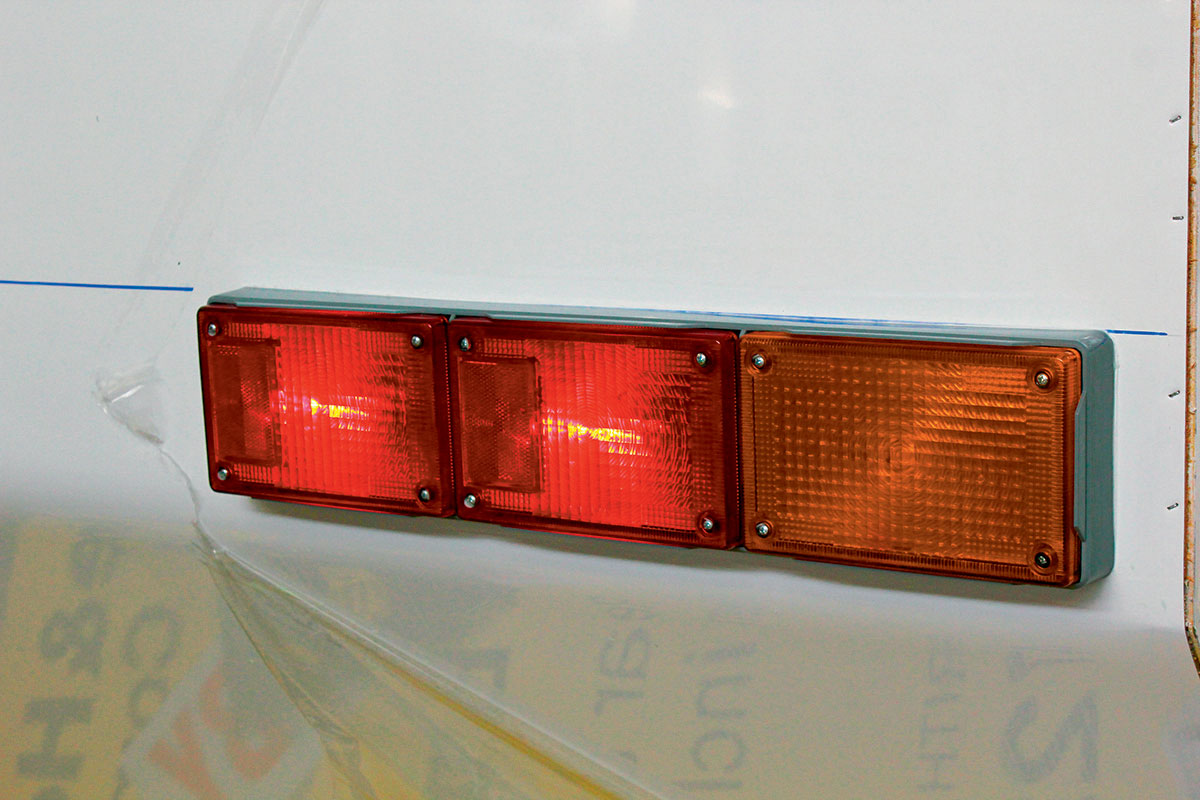
Finally, test the taillights. The most difficult part is to ensure that the wiring is correctly refitted so the lights work properly, and that the connections are completely sealed.
MEET THE AUTHOR

Philip Lord
Phil is a long-term vehicle tow-tester and also the former owner of a 1979 Viscount Grand Tourer, which he restored before selling it to make room for his next project: a mid-1980s Windsor Windcheater.
Phil has been a motoring writer for more than 20 years. He has tackled most automotive and technical subjects throughout his media career, which has seen him contribute to such illustrious journals as Caravan World, Camper Trailer Australia, Wheels, 4X4 Australia and Motor.