In the sixth part of our series on rebuilding your trailer, we’re going to look at how to replace the trailer lights.
A refurbished trailer is legally required to have working indicators and lights. Depending on what condition the old wiring is in, that could mean just replacing some existing lights with a new set, through to installing a completely new cable with connectors and all the light fittings.
Seven-pin small round and flat connectors are the most common options. Adapters are readily available for both. Your choice will usually depend on the towing vehicle, but if you’re not sure, an auto electrician will be able to find the one that’s right for you.
Do the groundwork
First, determine how much of the electrical system you’ll be working on.
Next, work out where the lamps will be placed and if necessary, drill holes ready for them. By law, lamps on the trailer must operate with the corresponding lamps on the towing vehicle, and if lamps or reflectors are fitted in pairs when you’re wiring trailer lights, they must be spaced equally on either side of the centre line.
There must also be a light illuminating the trailer’s number plate.
Run the new wiring
If you are replacing the entire system, you can purchase pre-wired socket kits with a 1.5 metre cable from most outlets.
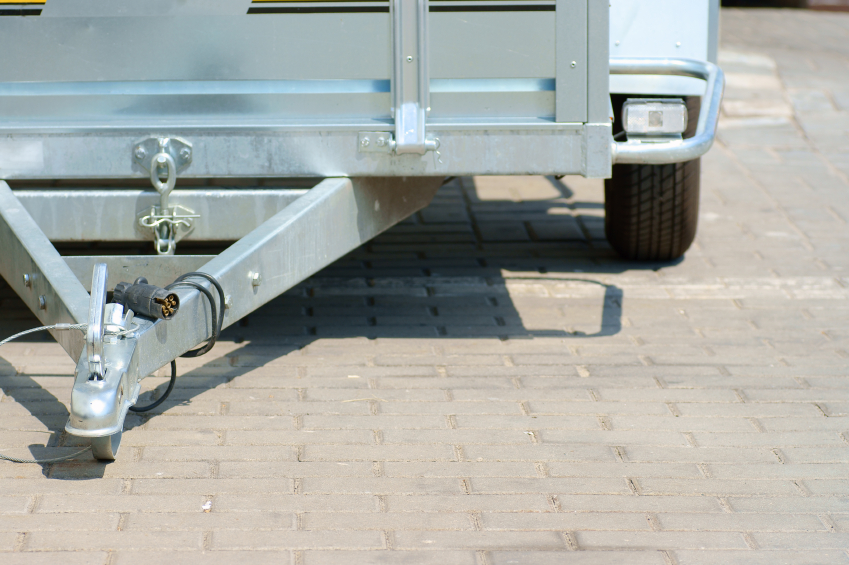
1. Run the cable down one side underneath the trailer, hooking it to the chassis rail. By law, your trailer wiring must be:
- Supported at intervals of no more than 60 centimetres.
- Insulated at joints.
- Located in a position where it can’t overheat or come into contact with moving parts.
- Protected from chafing.
2. Trim off any excess from the end and strip one centimetre of insulation from all the wires.
3. Mount the lamps according to the manufacturer’s instructions, making sure that no part of the trailer or its equipment obstructs the lamp output. On a seven-pin connector, the wiring colours are as follows:
- Left indicator: yellow.
- Right indicator: green.
- Reverse: black.
- Brakes: blue.
- Stop lamps: red.
- Earth return: white.
- Rear lamps: clearance and side markers, brown.
4. For detailed instructions on mounting LED trailer lights, look here.
5. Make sure you have an earth return wire between the trailer and the towing vehicle; it is not acceptable to use the trailer coupling or a safety chain/cable as an earth.
6. Connect the trailer plug to the socket on the tow vehicle and test all the lights.
Once you have the lights connected and working, you’re ready for the seventh step in your rebuild – replacing the floor.
You’ve nearly got that trailer back in shape, so you might like to take a look at the dos and don’ts of towing with it.