Caravans are not like cars, with their complex and vast electronic systems and mechanical components. No engine, transmission or diff oil changes to worry about, and no filter changes or complex electronic software issues to sort out.
A quick adjustment of the van’s brakes and bearings every year or so and you’re good to go, right?
Not really. There are plenty of parts on a caravan that can go wrong and cost you plenty if you don’t catch the problem in time.
Here are three basic problems you might find on your van that you hadn’t thought of. Your van might not ever have such problems, but if you don’t look, you don’t know.
Some of these you will notice easily enough when washing your van or setting up camp; others may require you to crawl under and around your van. These are also areas you should definitely check when looking over a used van that you are considering buying.
1. SEALANT DEGRADATION
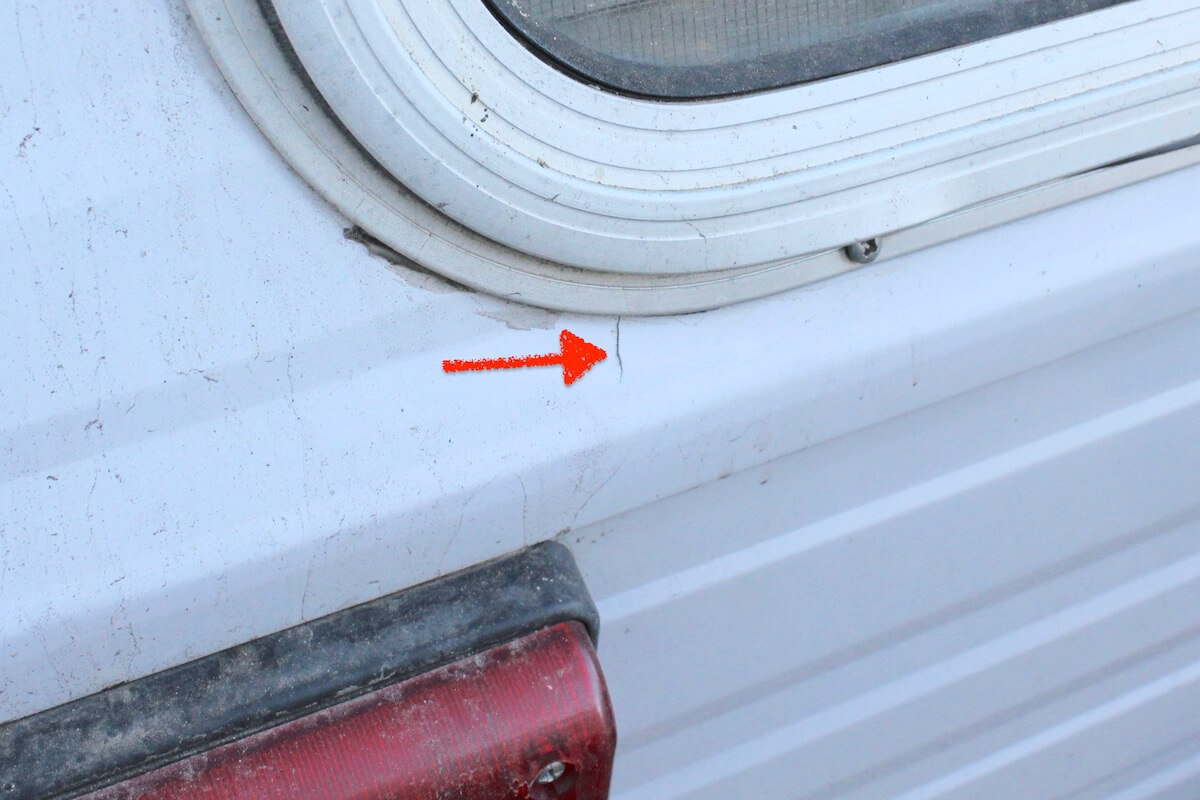
Water damage due to failed sealant is easily the most common problem for a caravan – particularly for aluminium-clad caravans, even relatively new ones. The sealant on exterior joins is prone to developing cracks when exposed to the elements or the sealant separates from the cladding surface. Sealant will not last forever. Add in a van that flexes a little and it’s not a matter of if but when seal integrity is compromised. In some cases, perhaps the sealant wasn’t applied properly when the van was built.
You should have a close look at all the joins, especially the J-moulds (which are the J-shaped moulds that seal the join between the side panels and the roof/front/rear panels), looking for separation of the sealant at the join or cracked sealant.
Roof hatches and other roof components can leak, too. When you’re on your ladder inspecting J-moulds, inspect the hatches and other components that have been screwed and sealed on the roof, such as solar panels.
Be careful when putting any of your weight on the roof – keep as close as possible to the sides of the roof.
Sometimes it’s hard to see a break in a seal on the roof, so in those cases have a close look inside, around the upper panels, looking for any dampness or discolouration (water stains) on interior linings.
Resealing a caravan well with ‘silastic’ sealant takes practice, as it’s messy stuff and there’s a knack to doing it well. If you’re doing it yourself, don’t use any old cheap silicone sealant, as some of these are acidic, meaning they’ll eat into the surfaces you’re trying to seal. A good quality V4 non-ascetic sealant is the way to go.
If the leaks have been there for a while, the timber frame (if applicable) may have rotted. The only way to address this is to strip the cladding off around the relevant section and inspect the timber. If it is badly rotted, the affected sections will need to be cut out and replaced. It’s a fairly big job.

2. FATIGUE CRACKS
Fatigue cracks can be a source of water leaks that you might not expect on an aluminium-clad van. Normally these cracks will only appear on older caravans on the aluminium cladding at weak points, such as around windows or doors, where the van body has flexed.
Have a close look over the van’s cladding, especially around doors, hatches, vents and windows for signs of fatigue cracks. On aluminium-framed caravans, also look for missing or loose rivets: again, frame flexing can cause them to weaken, break or loosen.
Fatigue cracks in aluminium sheeting can’t be effectively repaired – the affected sheet must be replaced. You might be lucky in that the fatigue crack doesn’t leak or is doing so minimally. It is only a matter or time, though, before it becomes worse.
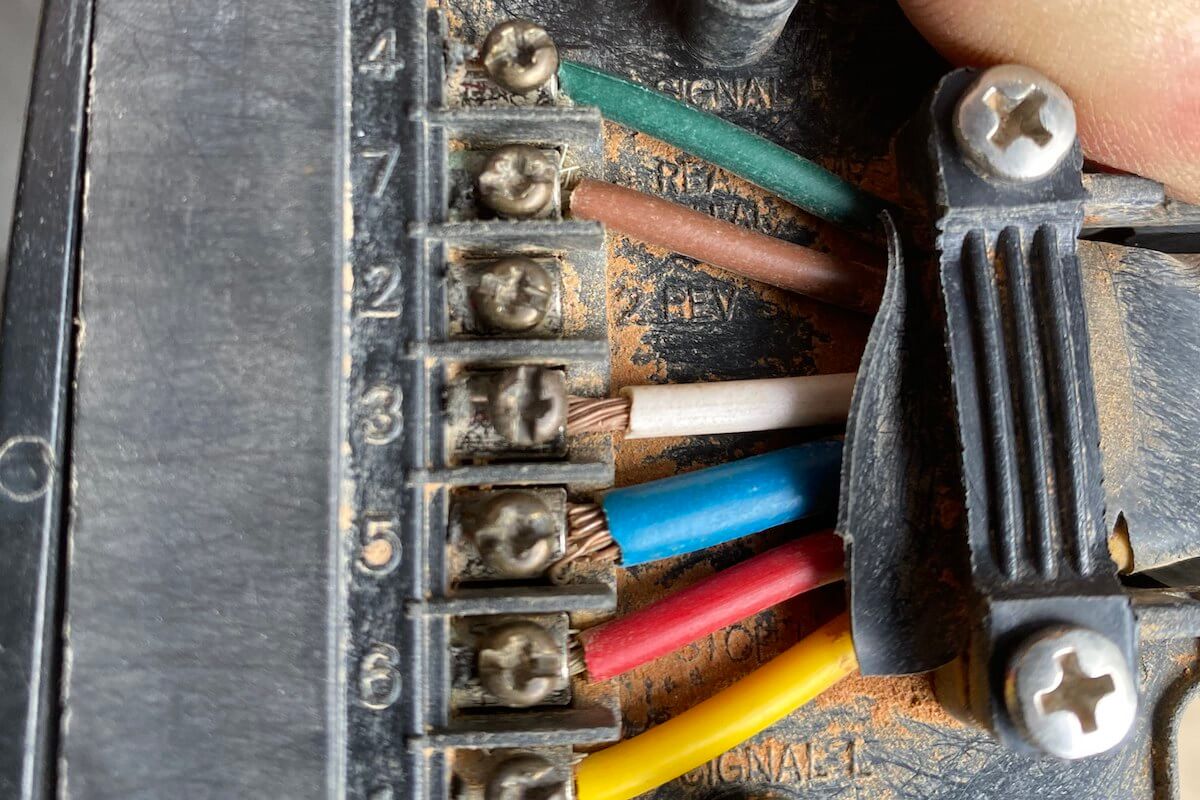
3. WIRING ISSUES
As a caravan ages – and even with not-so-old vans left out in the weather – broken or corroded wiring can occur, especially at the trailer plug.
Because wiring plug housings are not fully sealed, moisture can get in. The plug cover should be removed periodically to check the state of the wiring – if the wires are corroded or are fraying at the connections, it’s time to pull the wires out and clean them up. Better still, buy a new replacement plug. It’s cheap insurance.
The same applies to taillights and marker lights – if you’re not running LEDs, that is. Trailer lights can be inadequate in keeping out moisture, and so like the trailer plug, you need to periodically remove the lenses and see that the wire connectors and bulb holders have not become corroded.
MEET THE AUTHOR

Max Taylor
Max Taylor has been caravanning since he was a kid and was the editor of some of Australia’s most well-known RV publications for almost 10 years.