Sometimes wheel studs can fail, usually because a wheel nut is loose and the wheel is rattling on the studs, or because it has been over-tightened, usually as the result of the use of an impact wrench or “rattle gun”, which can produce stud torque loadings of as much as three to five times higher than recommended.
Should you have a broken stud, or one that is damaged from, say, a wheel being loose and moving against the stud, then it must be replaced.
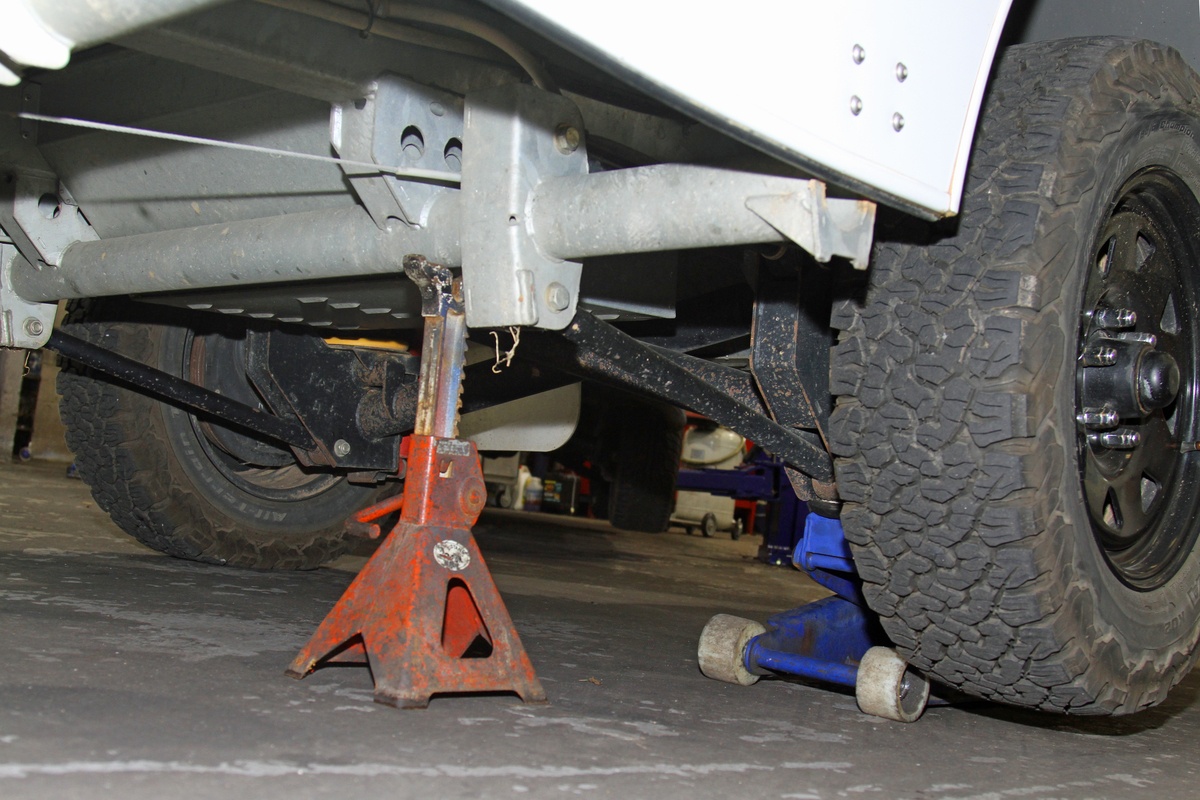
STEP 1
On a flat level surface hitch up your tow vehicle to absolutely ensure the van cannot move. Jack up your van, safely inserting Australian standard approved jackstands of an appropriate strength ensuring they are able to take the full load of the van. Remove your jack and remove the wheel nuts.
STEP 2
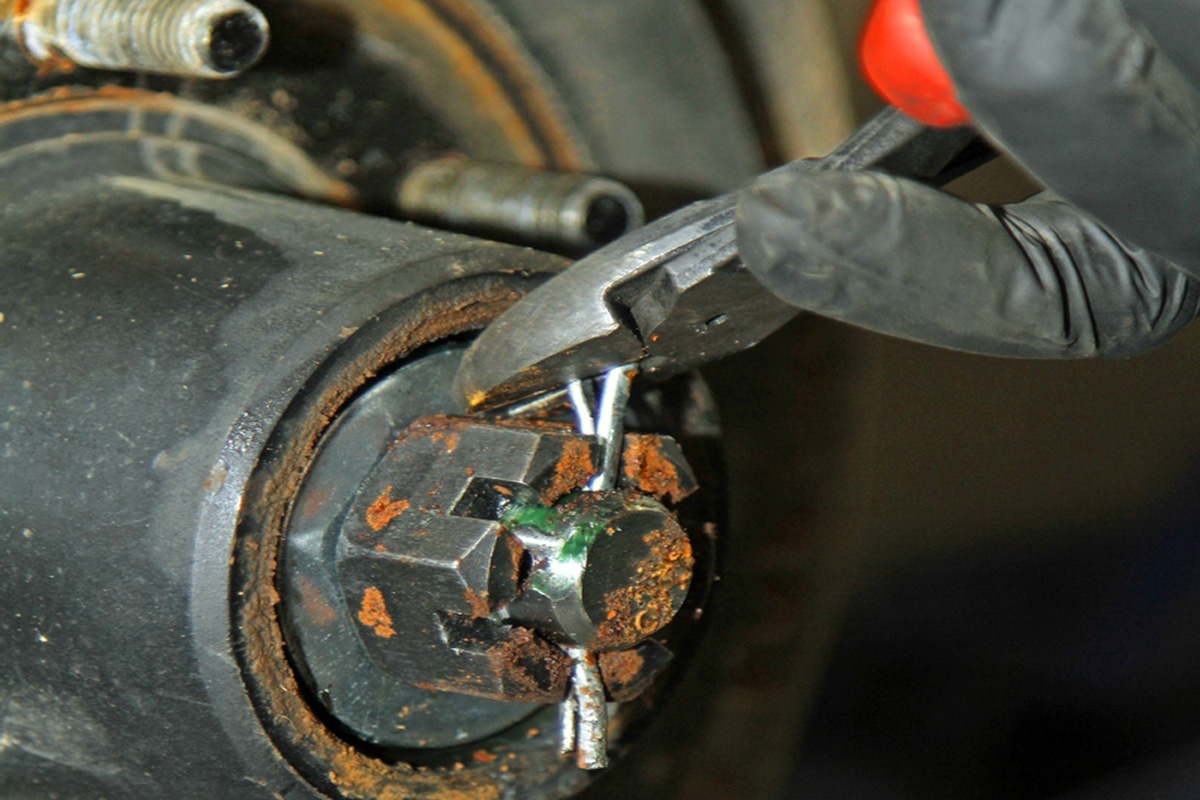
Gently use a chisel or a suitable flat blade screwdriver and hammer to remove the bearing hub cap. Use a pair of large side cutters or needle nose pliers to remove the split pin securing the castle nut. Unscrew the nut and wobble the brake drum to loosen the washer and outer bearing behind. Remove both the washer and bearing then pull off the brake drum, taking care not to damage the axle. Place each item out of the way on a piece of clean cloth.
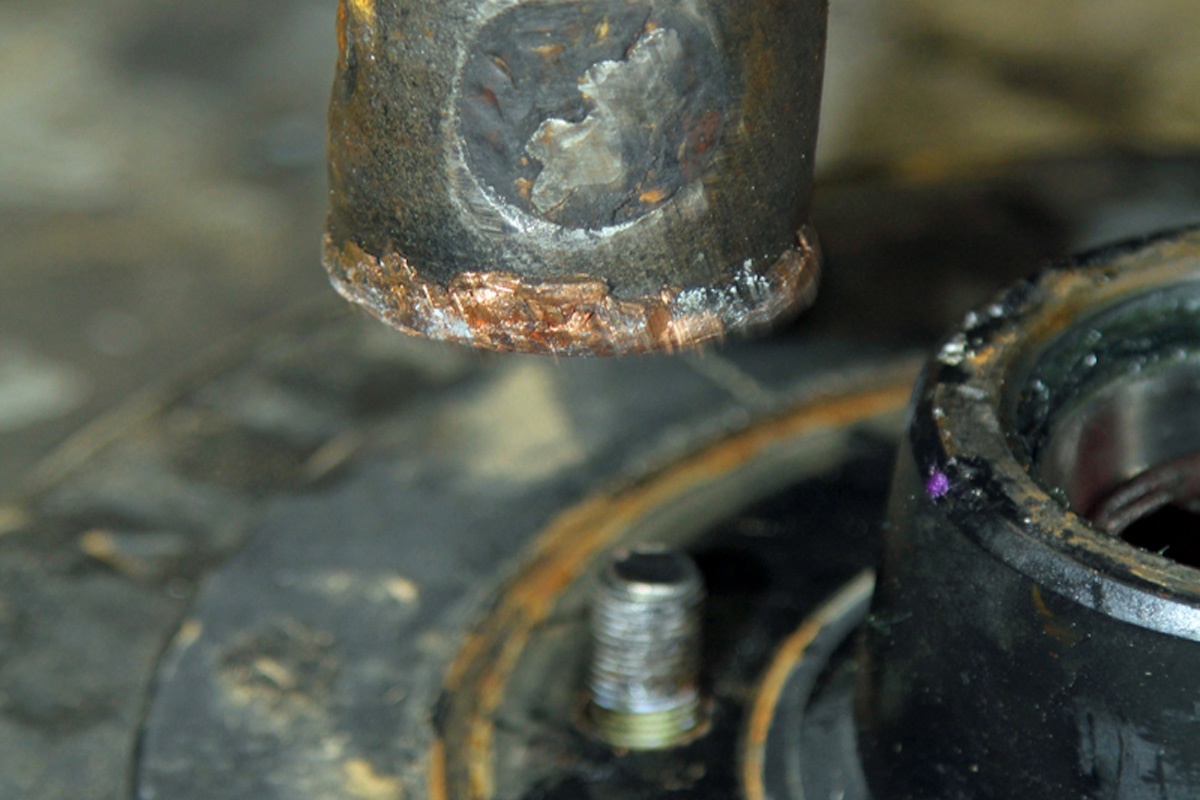
STEP 3
Place the drum with studs upwards and gently tap the damaged stud out of the brake drum with a hammer.
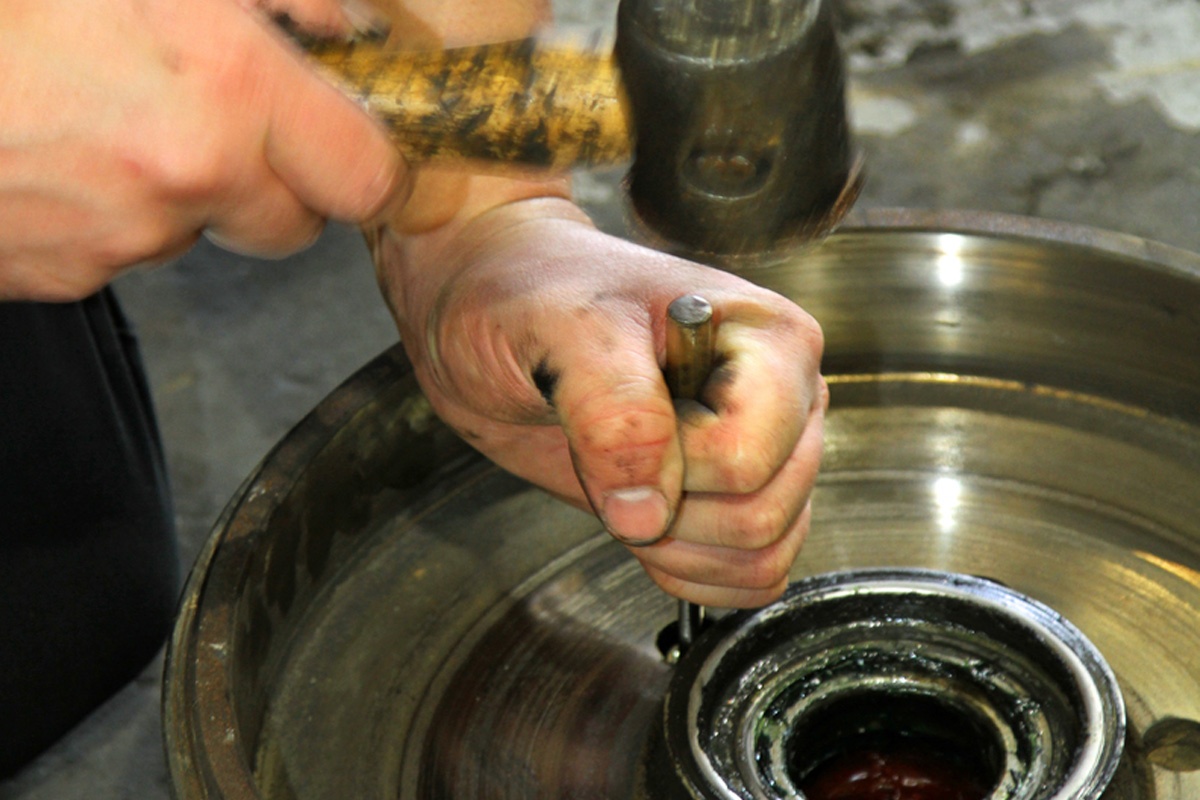
STEP 4
Seek guidance from service agent or manufacturer of hub/hub drum for correct stud (close enough isn’t good enough). Select a new stud to the drum axis gently begin tapping it into place using a pin punch and a hammer, taking care to ensure it’s going in straight. Ensure the stud heads are at a fully seated position when being torqued up.
STEP 5
Prior to refitting inspect the grease, if the grease looks old or has been contaminated during process be sure to replace it. Greasing Your Trailer – this article will help you with this step.
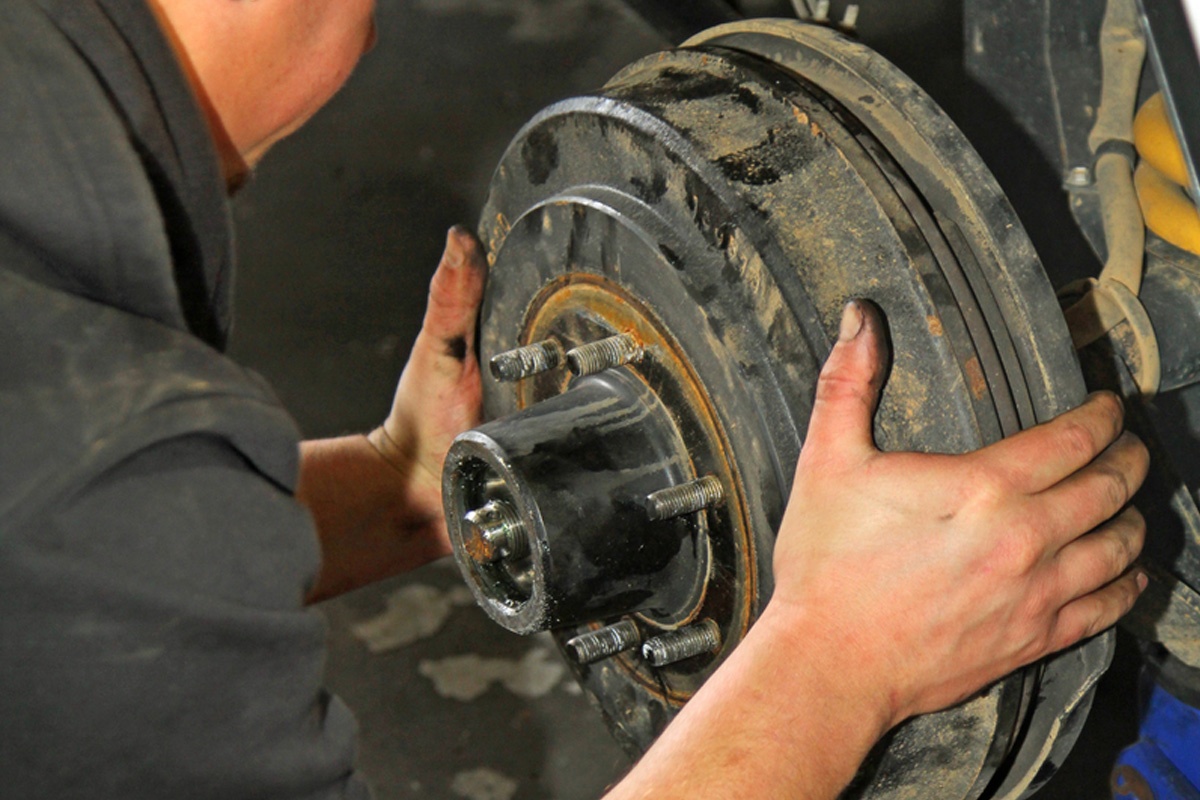
Give a thin smear to the axle and a little on the bearings and push the drum back onto the axle after wiping out any greasy hands prints and loose dust from the inside. Insert the outer bearing and washer and add the castle nut. Finish the process of adjusting it to the proper tension. When satisfied that the bearing tension is right, insert a fresh split pin and carefully replace the hub cap with a rubber mallet. Replace the wheel and check for movement. Torque wheel nuts in the proper order and to the right tension.
STEP 6
Remove the jacks and lower the van. Remember to wheel nut tension must be re-torque after 50-100km.
MEET THE AUTHOR
David Cook
David Cook has been a photojournalist in the magazine publishing world for 50 years, for 23 years of which he ran his own publishing business. As a keen camper he is now a well known contributor to several camping and travel journals.